What Causes House Siding Paint into Peel?

Peeling and flaking paint on a home’s siding not only makes the house look unsightly, it exposes it to additional damage and expensive repairs. A well-done exterior paint project looks good and protects a house from the components. With the right preparation, products and technique, the paint job should last for ages. Finding out how to get the job done correctly the first time saves homeowners time and extra expense.

Surface Preparation

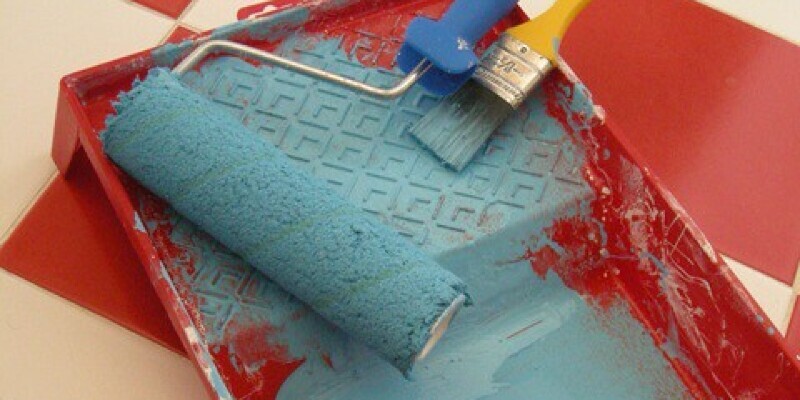
Painting a home’s siding successfully requires a decent amount of prep before the paint is used. Old paint needs to be completely eliminated, which is difficult on older homes which may be coated with several layers of weathered paint. The siding needs to be completely cleaned of all dirt, grime and mildew. A high-quality primer helps paint to stick better to the siding. Additionally, when it comes to wood siding, older, weathered wood does not hold paint well without a thorough sanding. Skipping the prep work ensures that the paint job will not hold up well over the long term.

Use the Ideal Product for Your Work

Most older homes were painted with oil-based paint. With the right surface prep, modern water-based latex paints can be used over oil-based paint, but oil-based paint cannot be utilized above latex; it will not adhere well to the surface. Siding made from hardboard may require a particular sort of primer. Aluminum and vinyl siding may not have to be primed in any way. Consult your siding or paint retailer to get information when it comes to your home.

Moisture Problems

If moisture has seeped between the house and its own siding, it can cause the paint to blister and peel off. Check gutters, leaders, the roofing and any other areas where moisture may have made its own way under the house’s siding. Making the necessary repairs can prevent other moisture-related problems and help to make the exterior paint project last longer.

Assess the Weather Report

Siding should not be painted in humid weather. After paint is applied, the moisture and solvents in the paint disappear, which allows the paint to form a tight bond to the surface. When the weather is wet or humid, the paint will cure before all of the water evaporates. Eventually it will begin to flake and peel off of the surface.

See related

How Dangerous Is Bone Meal Use to Fertilize Tulips?

Employing bone meal to fertilize tulips isn’t dangerous at all — it’s one of the preferred fertilizers for bulb flowers. You do not require much bone meal, and you just need to apply it once or twice each year, making it simple and cost-effective as a way to maintain tulips healthy and profitable. A couple of drawbacks exist, however, so weigh the fluid kind that’s ideal for your flowerbed.

The Way Bone Meal Helps Tulips

Bone meal’s most important benefit is that it also supplies a slow-release form of potassium into the ground. Tulips prefer soil that’s fairly bland, meaning that they do not like it loaded with tons of nutrients such as nitrogen. They require small doses of different nutrients, but too much could cause stunted growth or difficulties blooming for the tulips. The bone meal continues to release the essential phosphorus throughout the growing season, feeding the tulips and assisting them create large, colorful blooms.

How Much You Need and When

It doesn’t take much bone meal to assist tulips thrive. Adding a tablespoon of bone meal at the underside of every wax hole before you plant the wax is all you require. Tulips perform best when planted in the fall, which provides the bone meal a lot of time to release nutrients to the ground prior to the spring growing season arrives. For an added soil boost for next year, add another tablespoon about each plant after it fades from the summer.

Why You Might Want to Supplement

If you forgot to include bone meal to the planting hole in the fall, it’s too late in the spring to get the bone meal to perform any good to your current blooming season because of its slow-release qualities. Rather, add a superphosphate fertilizer around each plant, such as a 0-20-0. Use about 5 tablespoons of granulated fertilizer for each 10 square foot of garden bed to get bulbs. And though tulips do not like overly rich soil, they require a little more nutrients than that which bone meal provides. When your plants are not thriving like you believe they should — if the development is slow or the blooms are not forming in a timely manner from the spring — include a little amount of a balanced fertilizer, such as a 10-10-10. Five tablespoons each 10 square feet must be sufficient.

Bone Meal Disadvantages

Bone meal is traditionally utilized to help bulbs grow, but controversy exists over whether it’s the ideal alternative. Changes to the manner bone meal is currently mass means that the fertilizer doesn’t have the same concentration of nutrients it once did — many nutrients leach out throughout the manufacturing procedure. Also, the smell of bone function, which is made from the bones of creatures, might entice insects, raccoons or other animals to your yard, causing them to dig in your flowerbed to find the source of the odor.

See related

The Flowering Plum Shrub

Identifying a flowering plum shrub is complex due to a confusion of common names and the distinction between what is a tree and what is a tree. The deciduous purple-leaf sand cherry (Prunus x cistena), also commonly called the cistena plum, can be said to be a shrub or small tree. It will grow in U.S. Department of Agriculture plant hardiness zones 2 through 8.

Origins and Name

Although it is more frequently listed as a purple-leaf sand cherry, P. cisena can be listed as the cistena plum. The frequent name confusion is because both plums and cherries belong to the Prunus genus. In 1910, Dr. N. E. Hansen of South Dakota State University successfully crossed the purple leaf plum (P. cerasifera), indigenous to western Asia, and the indigenous American western sand cherry (P. pumila). To present his plumb-cherry hybrid a botanical name, Hansen combined prunus using cestina, the Sioux word for baby. In answer to the inquiry of whether P. cistena is just a flowering plum or a flowering cherry, then it is a hybrid, half and half.

Shrub Definition

There is no scientific definition that separates shrubs from trees. 1 useful distinction is that a tree is 13 feet tall and contains a back at least 3 inches wide measured 4 1/2 feet from the floor and also has a definite layer of foliage. Shrubs usually are less than 13 feet tall and have multiple transitions less than 3 inches in diameter. Cistena plum grows 6 to 10 feet tall with a spread of 5 to 8 feet, a shrublike height, although it only has a single trunk, suggesting a tree. In these instances plants are generally recorded as a shrub or small tree.

Description

The slow-growing cistena plum requires little upkeep. It has a curved shape with purple-red leaf which turns red in the autumn. After its leaves appear in the spring, the cistena plum yields fragrant, 1/2-inch-wide white flowers tinged with pink. It later produces scattered 3/4-inch-wide fruits that are utilized to make jellies, pies and jams and are much loved by birds.

Cultivation

Although the cisena plum thrives in full sun, it can be grown in partial shade. Both its blossom and leaf have a richer color if it is grown in the entire sun. It will grow in a wide variety of soils which range from light, sandy soils to heavy clays, although they should be well drained. It will tolerate urban growing conditions. The cistena plum is most usefully grown in a raised planter or at regions where it will prosper as a tree. It is usefully planted as part of a hillside mass of shrubs or as little hedge.

Issues

Cistena plums are prone to numerous diseases and insect pests, with the result that they frequently do not live longer than ten years. Japanese beetles such as their leaf and boring insects attack their trunks. Other issue insects include aphids, caterpillars, leafhoppers, scale, spider mites and tent caterpillars. Diseases include dieback, fireblight, honey fungus, leaf curl, leaf spot, powdery mildew and root decay.

See related

The Size of Azaleas

The azalea, a subgenus of the genus Rhododendron, is a flowering shrub that grows in U.S. Department of Agriculture plant hardiness zones 5 through 8. With several varieties and a selection of heights, blossom sizes and leaf lengths, then there’s an azalea that fits your landscaping needs. The plants commonly referred to as azalea and rhododendron, though both at the genus Rhododendron, are distinctly different plants. The classification of the azalea may cause some confusion if you aren’t familiar with the size and characteristics of the shrub.

Shrub Size

Azalea shrubs can be found in a number of varieties and a range of sizes. The height may reach up to 10 feet or as low as a 12-inch-high ground cover. Environmental conditions like water availability, soil and sunlight nutrition can impact the mature size of azalea shrubs. Seasonal pruning maintains a desirable shrub height and prevents the shrub from overgrowth. According to the Azalea Society of America, the shrubs may develop 2 to 10 inches taller annually. An azalea’s width is similar to its own height.

Flower Size

Azaleas produce funnel-shaped blooms in sizes which depend on the variety. The flowers range in size from 2 to 4 inches long with five stamens on each. Varieties can be found with multilayered petals on open flowers for a complete look or with small, delicate blooms. Tall-growing varieties tend to have larger flowers than shrubs of a compact dimension.

Leaf Size

Azalea shrubs have lush leaf growth in a medium-green to dark-green color. Some varieties have variegated leaves with white or yellow stripes. The leaves range in dimension from 1 to 6 inches long, depending on the range. Evergreen varieties often have shorter leaves than those of deciduous varieties. The leaves have a soccer form and may be narrow or broad.

Planting Details

The size of the planting hole leads to the proper increase of this azalea. Azaleas have a shallow root system and a wide spread. Place the shrub in a planting hole that is deep enough so the cover of the root ball is even with the bottom level or just above ground level. When you plant at least two azalea shrubs at the same area, the space between them is a significant consideration. Calculate their planting spaces by adding together the mature spread of this shrubs and dividing this value by the total number of shrubs, to give them room to develop to their entire display.

See related

Can You Cut Honeysuckle Down to the Ground?

Honeysuckles (Lonicera spp.) Contain both vine and shrub varieties and produce their signature accent flowers, which are often fragrant and attract hummingbirds and bees to your lawn. When these plants may be satisfying to the senses and attract wildlife, most honeysuckles are vigorous plants that frequently outgrow their designated area, and some could become invasive. When this occurs, you may cut honeysuckle into the ground, and it should not kill the plant. If you want to eliminate the plant, then cutting it isn’t the way to go.

Invasive Honeysuckle

Japanese honeysuckle (Lonicera japonica) is a number known to be invasive and grows in U.S. Department of Agriculture plant hardiness zones 4 though 10. This extremely vigorous variety can easily take over an whole area. Since cutting it to the ground, even, is not likely to kill the plant, then you will want to have a different approach. Digging out the plant’s crown is the very best way to eliminate this plant. Once the crown is removed, the plant won’t grow back.

Effects of Serious Pruning

Because cutting honeysuckle into the ground does not kill it, you can severely prune overgrown or scraggly honeysuckles by cutting them into the ground before new spring growth starts. Following a serious pruning, the honeysuckle will continue to grow rapidly, but won’t bloom the following season. If you want the vine to blossom, leave some of the older plant growth. Shrub varieties of honeysuckle may also withstand severe pruning and will send up numerous new shoots that require pruning to maintain the bush’s natural shape.

Care After Serious Pruning

Honeysuckle vines and bushes that have undergone serious pruning or that have been cut into the ground require special care as they work to grow new shoots. As the honeysuckle grows new shoots, make certain that the plant is well nourished and utilize an organic mulch, such as bark chips, around the plant’s base to help retain moisture and to inhibit weed growth. You can feed the plant using a general fertilizer once the plant’s earliest shoots develop full-sized leaves.

Regular Pruning

Since honeysuckle grows rapidly, it will not require pruning to thin vines or bush growth. You should prune to thin plants after the plants have been finished blooming. Thinning includes cutting back long shoots and removing broken or weak stems. Honeysuckles utilized as ground covers require pruning to thin out the dense canopy and keep the plant within its boundaries.

See related

The way to look at a Dishwasher's River Environment

If your dishwasher doesn’t fill with enough water to fill out the wash and rinse cycle, or it fills too much water, the water heater valve which allows water to enter the wash tub may have stuck in a semi-closed or even fully-open position. When the dishwasher fails to fill with water in any way, chances are the valve has failed. It is possible to perform a test without removing the water valve to find out the valve is actually the issue.

Close off the fridge’s electricity supply in the main breaker panel or unplug the power cord from under the sink. Open the support panel by removing the screws holding the toe kick to underside front of this dishwasher.

Look within the support panel for the water valve. It’s located in the right front or left of the opening under the bathtub. A braided stainless steel or braided black hose connects to the underside or side of the valve.

Locate the wires connected to the valve. Use needle nose pliers to catch the straps holding the wires into the valve. Depending on the model, the dishwasher has one port with 2 wires connected to two terminals or 2 straps with four wires connected to four terminals.

Catch the alligator clip on a continuity tester into the metallic probe on the other end of the tester to make sure the batteries are fresh. Replace the batteries when the tester doesn’t light.

Clamp the alligator clip to one of those terminals and touch the probe into another terminal. If the tester doesn’t light, the water valve has failed and needs replacing. If the valve needed two straps, repeat the test with the next pair of terminals. If the tester lights, then you also can check for mechanical flaws.

Reconnect the dishwasher to this power source. Start a clean cycle on the dishwasher.

Open the dishwasher door while it fills with water. If the water doesn’t stop, the valve is stuck open, and needs replaced. If the dishwasher under-fills, the valve could be limited and require replacing.

See related

How to Care for Strawberry Begonias

Strawberry begonia (Saxifraga stolonifera) gets its name because it spreads with runners — or stolons, as the species name suggests — to create new plants, like strawberry crops. Also known as strawberry geranium, creeping saxifrage and mother-of-thousands, strawberry begonia thrives in U.S. Department of Agriculture plant hardiness zones 6 through 9 and is commonly grown as a houseplant in colder climates. Grown outside as a ground cover, strawberry begonia grows gradually with an average height and spread of 1 foot. The plants show white asymmetrical flowers in late spring to early summer and provide evergreen foliage through the winter.

Plant strawberry begonias at an area which receives partial shade to full shade. They function well as a ground cover at border plantings, shaded rock gardens and woodland gardens. The space should have ample, well-drained soil. You may incorporate 4 inches of organic humus fabric with a rototiller, including materials such as compost, leaf mold, grass clippings, manure and sphagnum peat to enhance the structure of clay soils, if necessary.

Water the plants to keep medium moisture, allowing the top 1/2 inch of soil to dry between deep waterings.

Fertilize the plant with organic fertilizers, such as fish emulsion or blood and bone function, implemented as a side dressing around crops, if wanted. You could also add compost into the soil around plants to restore nutrients into the soil or utilize complete fertilizers, such as 10-10-10, conservatively to avoid cutting back the plants.

Spread a 2-inch layer of organic mulch material, such as shredded bark or humus, around the plants to help retain moisture in the soil. Do not push the mulch directly against plant stems.

Remove runners in the plant to prevent them from taking root and spreading into unwanted regions of the garden. If you would like the strawberry begonia to take over a flower bed, then it is possible to instead plant the runners so that they take root. These slow-growing plants do not need pruning except to remove dead plant material.

See related