8 Best Design Ideas For Beautiful Pools

A handyman Phoenix AZ is a great home amenity to have. You’ll have your own place to sit down, relax and enjoy a drink. If the weather gets really hot, then a dip in the pool is a great way to cool down. Now, if you are thinking of building a pool for your backyard, then you might need a few design ideas. Well, that’s what this article is all about.

Hill Country Ranch

If you have a large space like a country ranch, then you can go nuts on the side amenities of the handyman Phoenix. For example, you can add an outdoor living room, kitchen, and a bar.

Long Island Bungalow

If you have a small backyard but plenty of lawn, why not place the swimming pool right in the middle of your lawn? It doesn’t have to be a large pool, and a lot of greens around it will make it look astonishing.

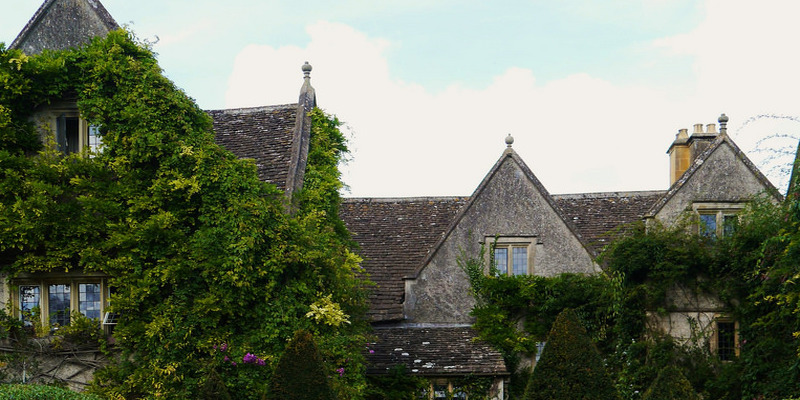
Stone and Timber Pool House

If your home features an old house theme, then a pool surrounded by natural stone and varnished timber will look great. Plus, the emerald color of the water will really compliment the stone accents around the Phoenix handyman. It’s as if you have just brought a natural mountain pond to your own backyard.
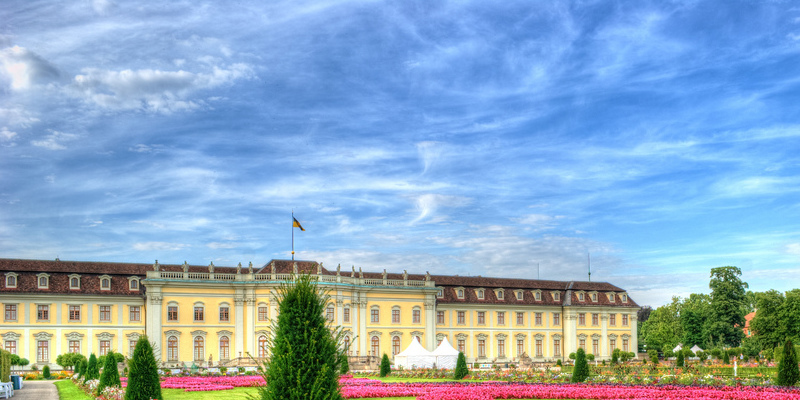
California Dreams

This design really goes well with a house design that features a classy bungalow style. With marble stones that surround the pool and lots of soft lighting, you’ll be showing off a classy and luxury pool backyard design.

Tile Accents

If you already have a pool and it’s looking a bit old but you don’t have a big budget for a full-blown renovation, then a single upgrade may do the trick. All you need to do is add decorative tiles that go well with the house design, and your pool, home, and backyard will be looking great again.
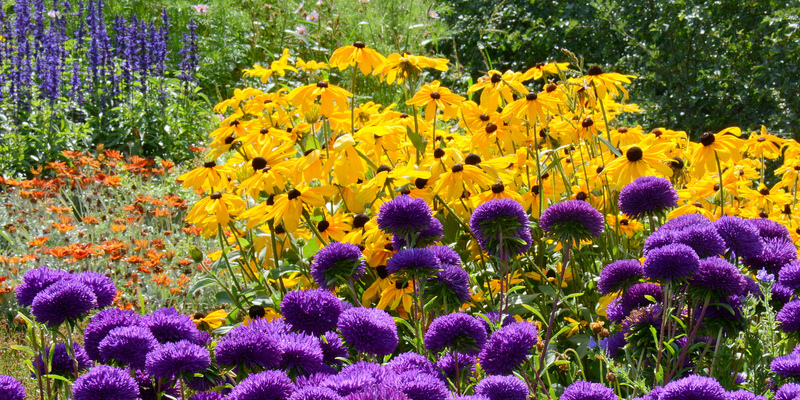
Natural Space

If you want a pool design that will bring you closer to nature, then place the pool in the middle of a lot of trees. Or, you can have a lot of trees planted around the handyman services Phoenix. Either way, you’ll have a pool that you can relax in and have that one-with-nature vibe.

Classic Theme

If you have a house that features a traditional architectural design, then going for a pool with a classic theme may be the right choice for you and your home. Go with darker shades of stone to surround the pool. Red bricks on the outskirts will also look great. Use decorative stone sculptures around the pool to enhance its aesthetic theme.
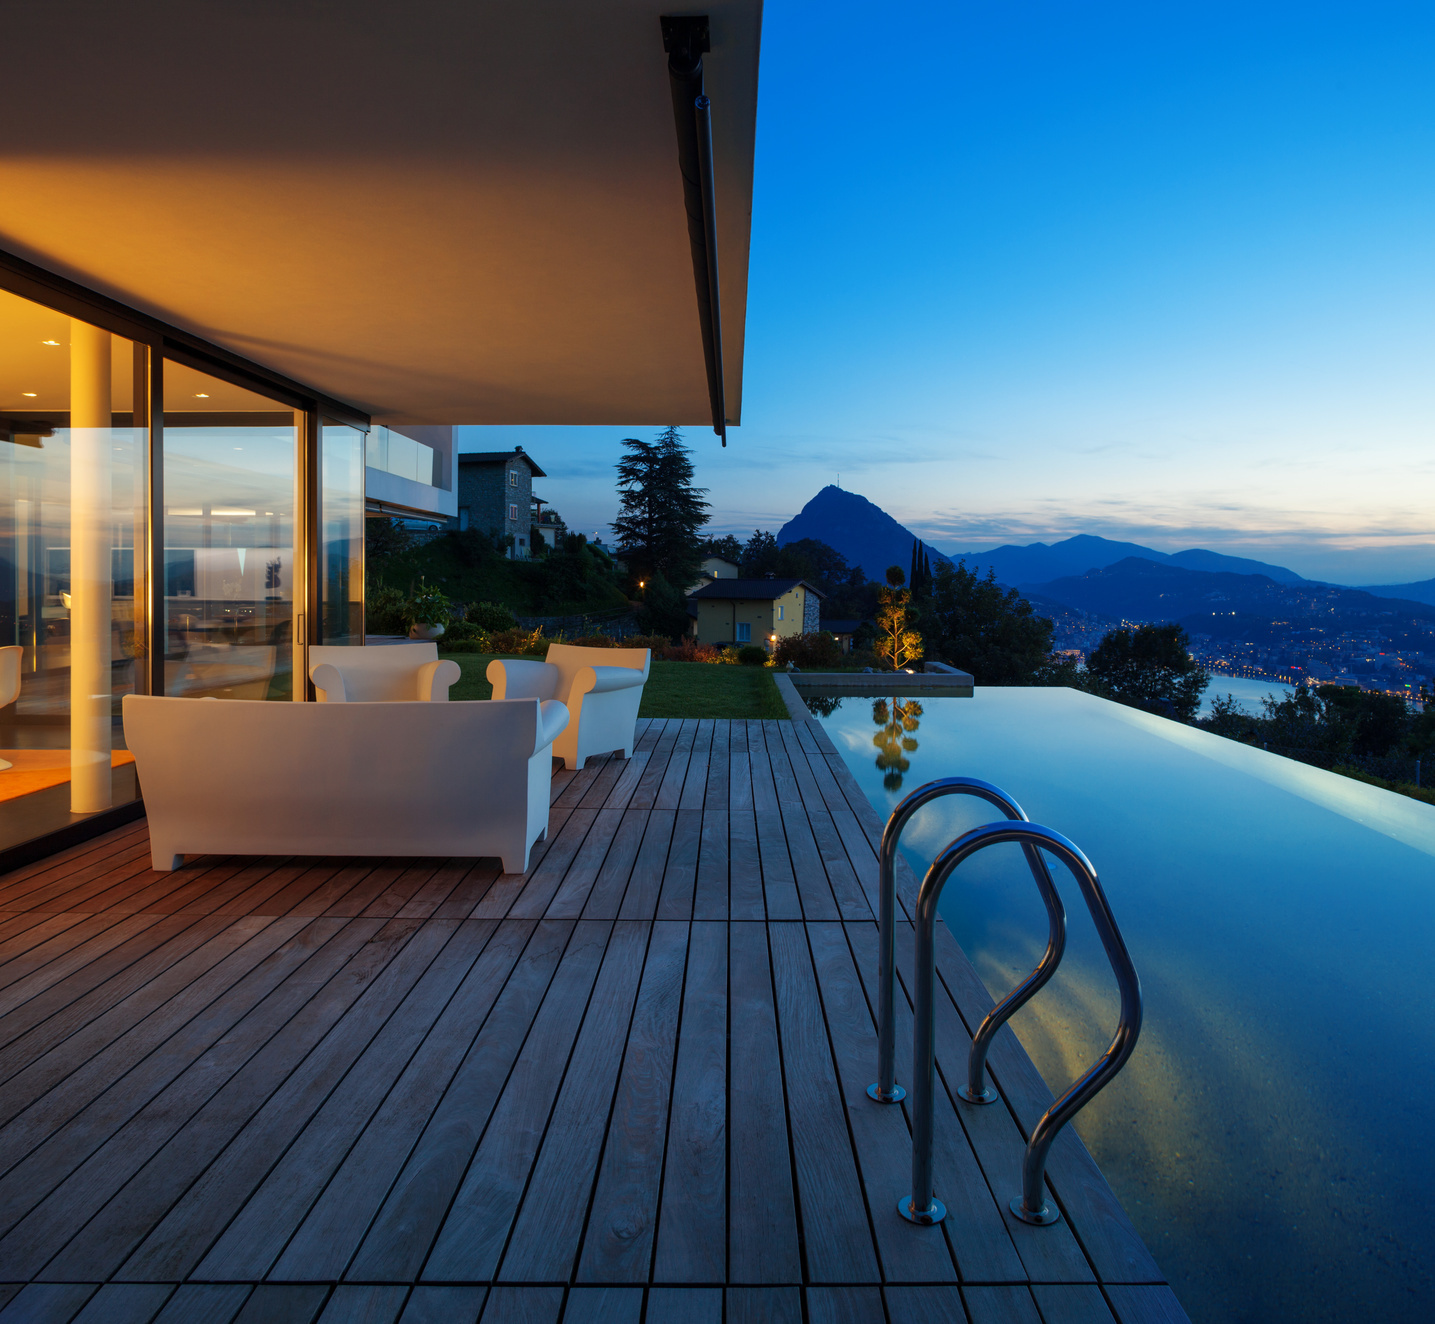
Pool With A View

If you have a backyard with a view, then why not make the most of it? What you can do is to build an infinity Phoenix handyman services. Don’t forget to surround the pool with little tables and lounge chairs. Once you have done that, you’ll have the ultimate backyard viewing setting. Don’t be surprised if your backyard becomes the favorite spot of your friends.

Things Needed to get a Zen Garden

Zen gardens have a layout that is basic, with rock and sand forming the factors that are main. Their simplicity, which has a powerful association with practice and Zen philosophy, produces room for meditation or contemplation. While Zen gardens are minimalist in character, each component has a powerful symbolism that makes a well thought out layout important.

Sand or Gravel

Good gravel granite or little pebbles are spread from the other side of the flat area of a Zen garden. In order to rake them into designs these particles should be angular rather than spherical. In a brightly lit location sand or gravel works more effectively than components that are mild as it will not mirror as much glare.

Stone Types

Stone features a notable part in a Zen garden, in which big rocks are positioned strategically around a flat work surface that is flat. Stone styles symbolize different facets: air, steel, earth, fire and water. While steel is represented by reduced vertical stones tall stones symbolize wood, and trees. Stones using an arching or branching form symbolize fireplace, while water is represented by wide, flat stones. Stones, observed as having an appearance of tranquility and rest, signify earth.

Purposeful Arrangement of Rocks

A Zen garden frequently utilizes rock, along with gravel or sand, to produce a fairly summary representation of a landscape that is bigger. The sand could be viewed as representing water, as well as the rocks might symbolize islands or mountains. Animals may be also symbolized by rocks, or be organized to the form of an animal like crane or a tortoise. These animals symbolize longevity. Rocks to get a Zen garden are dark grey or usually mild, using a weathered look. Gravel or sand is usually raked to produce a ripple-like result.

Plants

Zen gardens usually include small vegetation, but might contain lichen or moss. Rocks with lichen are frequent in Zen gardens. They are reduced, spreading species, when crops are included by Zen gardens. Plants woodland and are generally evergreen kinds. Rather than huge plantings, a Zen backyard might contain ever Green shrubs that are pruned as a border or accents.

Enclosure

Zen gardens are frequently surrounded by means of an enclosure to supply tranquility and privateness in the garden. This enclosure may possibly choose a collection of stones, or the kind of a stonewall providing definition to the fringe of of the backyard.

Human-Created Components

Zen gardens might include human-designed components for example lanterns, bridges and pathways. Bridges allow the backyard to be seen by people from a new angle. A bridge can consist of only stone slabs organized within an arch that visitors can walkover. A subtly described pathway of steppingstones that are reduced also suits properly in a Zen backyard. Lanterns, generally produced of stone or wood, are regarded mo Re fitting of the natural ambiance of the garden’s than steel.

See related

Four Kinds of Septic-Secure Perennials to Assist Disguise Your Septic Tank

Installing a system leaves a big area that is bare, some times in the greatest planting room in the lawn. The top-soil is combined with together with the subsoil on the septic, producing a sub-standard soil that retains water. While their roots hold the soil in place avoiding erosion plants can eliminate that extra moisture in the soil. Trees and shrubs that are large produce deep tap roots that split and invade pipes, therefore the only secure alternative would be to place shallow rooted crops on the septic. Use crops that are perennial to reduce the need to disturb the soil.

Ferns

Ferns protect big places rapidly and give a appear to places in shade. Maidenhair ferns (Adiantum spp.) create big leaves made up of leaflets in a fan-shaped pattern. Western maidenhair (Adiantum aleuticum) grows in Sunset’s Environment Zones 1 through 7 and 14 through 21. The fronds type a finger-like routine achieving 12 to 30-inches tall. Rosy maidenhair (Adiantum hispidulum) grows to one foot tall, with rosy-brown new development that turns green as the leaves age.

Grasses

Grasses keep the soil in place by using their intricate tangle of roots, which stops erosion on the system. Yellow foxtail grass (Alopecurus pratensis “Aureus”) grows in Sunset’s Environment Zones 2 through 10, 14 through 17 and 21 through 24 in total sunlight. Aureus is marketed as Aureovariegatus or Variegatus. The 24-inch-tall grass types mats 18-inches broad. The grass blades are green-striped with gold. This grass stays evergreen in winters which don’t fall below-freezing temperatures and areas with great summers.

Herbs

Long-lived they fill the region with aroma and perennial herbs do not require much upkeep. Yerba mansa (Anemopsis californica) grows to a height of one foot tall with upright stems coated in spicy aromatic leaves. Each stem is topped using a cone like structure covered with small white flowers surrounded by bracts that disseminate to resemble petals. Another choice to use on a septic is rosemary (Rosmarinus officinalis), that’s an aromatic herb used in cooking. The needle like leaves produce a scent when crushed. While Corsican Prostrate creates arching branches 18-inches large, Collingwood Ingram reaches up to 30-inches tall. Both kinds of herbs increase in Sunset’s Environment Zones 4 through 2-4.

Accent Flowers

Flowers that are dramatic type accents in the backyard, and several don’t have a very deep tap root. Chinese floor orchids (Bletilla striata) merge properly with ferns, decorative grasses and wild flowers. 18inch normal watering in spring of 12 – to floor orchid generates flowers on top, this 18inch stems that last for six months. Blossoms are produced by Alba, while Murasaki shikibu creates blue-lavender flowers. The cultivar Albostriata grows green-and- white leaves with light-pink blossoms. These terrestrial orchids increase in Sunset’s Climate Zones 2 B through 9 and 1 2 through 2 4.

See related

The best way to Propagate Pokeberry

Pokeberry (Phytolacca americana) is also called pokeweed, poke salad, scoke, pigeon berry and inkberry. It’s a herbaceous perennial weed that will grow into a height of 8 to 12-feet and width of 3 to 6 feet in Sunset’s Environment Zones 4 through 2-5. It’s burgundy stems, 6- to 12-inch-long leaves and 6- to 10-inch-long racemes of white flowers in the summer. Birds give way to green berries which progressively ripen to nearly black and eat the flowers.

Propagation from Seed

Collect a pint of berries in the fall. Wear rubber gloves when handling the berries. Place them. Smash the seeds to be exposed by the berries. Fill the container with water and allow the berries that are smashed soak undisturbed for three to four times.

Stir the water to separate the seeds in the pulp and berry skins. Let it sit for several minutes to enable the seeds to sink to the underside of the container. Pour off the water and select the seeds from the container. Put the seeds into a container that is clear and wash as pulp that is much off as feasible.

Spread the seeds from paper or newspaper towel to air-dry. Wrap the dry seeds in a clean paper towel, place them in a baggie and seal the baggie. Store them at about 40 degrees Fahrenheit for 90 days. This period is required for for seed germination.

Spread the seeds -rich garden soil in springtime where they are going to be uncovered to 4-to 8 hours of sunlight each day. Cover them using a really thin layer of soil that is free. Space several rows 4 feet apart. Water them as frequently as required to keep the soil moist. Thin the seedlings to 3-feet apart within each row when they’re three or four inches tall.

Propagation from Root Cuttings

Dig the roots of a recognised pokeberry plant in the winter or springtime using a grime shovel up. Cut 6 inch parts of of root with hand pruners.

Plant each area of of root in a container of soil-based potting mix in the event that you dig these in the cold temperatures, in the same depth they were developing formerly. Plant them straight -rich garden soil in place or a partly sunny in the event that they are dug by you in the spring.

Keep the s Oil persistently moist before the stems that are new are inches large. Transplant the seedlings to the backyard in springtime from their containers.

See related

The best way to Grow Charentais Melons

Some folks concur that the French do it better in regards to cantaloupes. Sweet and juicy, Charentais melons (Cucumis melo “Charantais”) are sensitive fruits, in regards to the size of softballs. To provide them with a try in your backyard, start them following the last spring frost and anticipate your vines to create an initial harvest in about 90 days. Charentais melons develop properly in Sunset’s Environment Zones 2 to 2 4.

Spread 2 to 3″ of organic matter, like leaf mould or compost, along with the soil in a sunny area that receives a minimum of six hours of sunlight.

Broadcast a full, well-balanced fertilizer, like 101010, on top of the organic matter, utilizing the price indicated on the label.

Work fertilizer and the organic matter to the top 6 to 8″ of soil using tiller, a garden fork or spade.

Form little 2 inch-large mounds which are about 4″ in diameter, spacing the mounds 4-feet apart.

Plant three or four seeds in every hill, burying them 1-inch deep, and protect the hills with one to two inches of a different mulch or straw. Water the hills Always keep keep the soil moist through the growing season as the vines grow.

Harvest fruits when they appear yellow in the bottom and have the scent of cantaloupe. They are going to be about the size of softballs. After harvesting fruits continue to develop on the vines.

See related

The best way to Germinate Pinecone Seeds

A pine-tree from seed is an activity to get an individual gardener. Worldwide, you will find more than 115 various species of trees. Many are indigenous to Sunset Climate Zones. Others that develop properly in Sunset Climate Zones are introduced from other countries including China, Japan and Australia, with similar climates. Pine trees are evergreen trees, retaining their lengthy, deep-green needles year around. Pine cones aren’t a seed nor a fresh fruit. They’re a a good cluster of scales grouped together to safeguard the building seeds inside. Pine cone seeds, precisely stratified, may be germinated relatively effortlessly to cultivate trees that were new. When the cone has been harvested by you from an area tree, you may develop a tree that can be effective in your environment.

Collect seed in the fall when cones start to open. Open cones have previously dropped their seeds. Collect closed cones. Wearing backyard gloves, the needles are backed by bend and twist the cone. Place cones. The seeds drop out in the bag when the cones open.

Store seed in the freezer. Remove the seed in the freezer around 60 to 90 days prior to the last spring freeze. Allow the seeds to warm to room temperature. Place the seeds in a glass plate of of luke-warm water and soak for 24 to 48 hrs.

Drain the seeds however don’t let them dry entirely. Place moist seeds in a zipper-top plastic bag and place in the vegetable drawer of the fridge for 60 to 90 times. Don’t permit the seeds to freeze. Remove in the refrigerator following the seeds have stratified for 60 to 90 times.

Prepare a mixture of 3 parts potting 1 component backyard sand, 1 part peat moss, 1 part pine bark and soil. (Don’t use beach sand that might contain salt.) Fill 4 in. pots with good drainage with the potting mixture. Place 1 seed in every pot. Cover the seed with 1/4 of potting combination. Water properly. Place in a full-sun location, safeguarded in the wind.

Keep the s Oil combination in the moist that is uniformly. Consistent dampness is critical to seed germination. Don’t permit the the top of s Oil to dry totally. As seeds develop and germinate, water everyday. When seedlings are 8 to 12-inches tall, they’re prepared for transplanting or repotting to your location.

See related

The best way to Hang a Mirror on Ceramic Tile

Bathrooms with ornamental or specialty tile have tiles that extend to the ceiling in the floor. While this look makes for easier cleaning and is spectacular, it may make it challenging to install things into it it. To to hold a mirror above your bathroom sink on a wall you need to penetrate the tile from which to to hold the mirror and install wall anchors.

Measure the mirror as well as the wall where you want to to hold it. Determine where the screws will soon be placed. As an example, some mirrors hang with a wire on the other side of the back, while the others have clips that are specifically positioned. When determining where to place the screws take notice of the hanging approach.

Place pieces of masking tape on the wall where the screws will soon be installed. Mark each bit of tape where you are going to drill, using a pencil.

Place a carbide- or diamond-tipped drill bit to the drill.

Dip the bit into a vial of oil that is cooling and place it against the pencil mark on the tape. Twist the drill again and forth several times make it possible for the bit to bite to the tile.

Begin drilling gradually to the tile. Keep a light-pressure on the drill as it undergoes the tile and to the drywall. In the event the bit starts to smoke or change red, quit and redip it before continuing to the oil.

Push a wall anchor into each hole. Make sure you use screws and anchors designed to support the the weight of the mirror you’re hanging.

Screw the hanging screws to the anchors, utilizing the drill. Leave a tiny section of the screw-head standing out of the wall to provide the mirror something where to to hold.

Line up the wire or hanging clips of the mirror using the screws and hang the mirror on the wall.

See related

The best way to Install a Ceiling Fan Light Twin Dimmer Switch

One switch usually gives electricity that is only requiring one to utilize chains to select a lover pace, and to to show the lights on / off. It’s possible for you to install a ceiling fan-light dimmer that is twin switch to to use light intensity and the fan speed in the wall change area that is first. The change that is new does need a wire that is extra to to be able to operate to to split up the light from your fan.

Turn in the light change in your ceiling fan. The blades are turning as well as the lights are burning.

Find the 15- or 20- . Turn the breaker off to disconnect the electricity. The ceiling fan-lights will be off as well as the fan blades will stop turning when you flip off the breaker that is right.

Hold a non-contact voltage tester from the ceiling fan wall-switch cover plate. When electric power isn’t current in the switch the indicator bulb on the tester WOn’t light.

Remove the screws holding the cover plate. Touch the tester to the two black wires connected to the medial side of the ceiling fan change to assure the power is disconnected.

By by eliminating the two to four screws release the ceiling fan canopy in the hanging bracket on the ceiling. In order to test the wires connecting the ceiling fan to the wires in the lover electrical box, let the canopy relaxation from the ceiling fan motor.

Hold the tester from the black wires linked as well as a wire connector. Although you switched off off the breaker that is right, double check before disconnecting the wires for strength.

Untwist the connectors keeping the wires to the ceiling fan wires in the box. Lift the ceiling enthusiast in the hanging bracket and established it on a worksurface that is a reliable.

Release by by detatching the two screws keeping it, the ceiling enthusiast wall change from your wall. Loosen the two final screws on along side it of the swap so that you can release the wires that are black. Dispose of the unique ceiling enthusiast wall swap.

Bend the ends of the copper that is white, black and bare wires in the box in the ceiling right into a hook. Create a hook-in the end-of a size of 12-3 non-metallic . that is electrical Hook the wires in the ceiling box to the 123 NM cable together Wrap the wires until the 123 is in electrical tape securely connected to the wires in the ceiling.

Look in the box that held the ceiling lover change. Get the wire connectors keeping the copper wires and the wires. Untwist these connectors and pull the two sets of wires aside.

The black, white and bare copper wires that operate in the box in the wall in the ceiling to the box. Pull the wires from your box in the wall. Pull the 123 attached as you pull the wires This replaces the 122 with the new 123 NM cable.

Pull the cable till you expose a-T least 8″ of 123 NM cable a T the electrical box in the wall. Cut the tape from your electrical cable to produce the outdated 122 NM and discard it. Leave a-T least 8″ of cable uncovered in the ceiling box.

Insert the ends of the 12 2 NM cable in to the middle hole of a cable ripper. Squeeze the ripper’s handles together to rip open at least 6″ of exterior sheath on the cable ends. Use wire-cutters to slice the the sheath that is free and expose the four wires within the cable. Strip about 3/4 inch of insulation off each of the uncovered wires, utilizing wire strippers.

Place the ceiling enthusiast to the hanging bracket on the ceiling. Connect the black motor wire in the ceiling fanto the black wire in the box. Twist a wire connector onto the wires that are black to secure them. Repeat this relationship for the two wires that are white.

Twist a wire connector onto the green wire in the ceiling fan-to the copper grounding wire from your box to link the two wires. Connect the red wire that is remaining in the ceiling to the remaining mild fixture wire from your ceiling fan. With regards to the manufacturer, this wire could be black using a stripe, blue or black having a yellow stripe.

Slide the canopy within the hanging bracket. Secure it with the screws you eliminated formerly.

Reconnect the white wire within the box in the wall to the new wire that is white, utilizing a wire connector. Do the sam-e using the two copper wires in the box. Carefully drive the two sets of wires to the rear of the box.

Get the black electrical wire called “line” connected to the ceiling fanlight twin dimmer swap. Connect it to the unique wire from your wall box using an orange wire connector. Connect the black electrical wire in the dimmer called “load” to the new black electrical wire you pulled to the wall box with a different connector.

Connect the red electrical wire in the wall box to the remaining electrical wire on the swap defined as “light” using an ultimate orange wire connector.

Position the twin dimmer change in the wall box. Secure the bottom of the dimmer and also the top change with all the screws that was included with it to the wall box. Cover plate provided together with the dimmer change.

Turn the breaker to reconnect the electricity to the ceiling enthusiast.

See related

The best way to Raise Cucumbers Inside

After buying a cucumber (Cucurbitaceae) from the nearby farmer’s market, you slice into it and savor the great, refreshing crunchiness the the new cucurbit offers. With that one style, you might be inspired to develop your cucumbers, permanently abandoning supermarket create. Not all properties offer the luxury of outside gardening area. Using a big container as well as a window, nevertheless, it is possible to grow your own cucumbers in-doors. Choose compact -range cucumbers, which are significantly smaller compared to cucumbers, making them -suited to in-door container development. Cucumbers prosper in the Environment Zones 1 through 4-5 of Sunset.

Choose a big container on your cucumbers. Cucumbers have extensive root systems, therefore something the size of a 5-gallon bucket or greater is best for crops that are healthy.

Drill holes for holes don’t currently exist. Place the container or tray to catch water as it drains from the container.

Mix planting medium with peat moss ready natural compost, aged manure and other organic matter. These improve soil structure to permit sufficient drainage and moisture retention and include nutrients. The materials that is natural in the course of time reduces to become part of the soil. A ratio of one part organic matter to to 2 parts potting soil is usually adequate.

Place the container with a window from air conditioning vents. A south- or east-facing window is most useful because they obtain the most mild through the day.

Fill the container with all compost blend and the potting soil, leaving at least 3″ open in the very best of the container.

Dig one large-hole about 1-inch deep in the guts of the pot and location six or five cucumber seeds spaced aside in the s Oil. Plant less or mo Re seeds depending on the dimension of the container. There’s a higher possibility that a T least one plant will emerge when seeds are planted in a time. Cover the seeds with s Oil and pack to ensure con-Tact together with the s Oil to aid with germination.

Apply roughly 1 tablespoon of a full fertilizer, for example 101010, evenly s Oil. Granular fertilizers are water-soluble and launch nutritional elements gradually into the soil. Aged manure additional compost and blood and bone meal are natural fertilizer options you may use.

Water the s Oil so it’s evenly moist but maybe not damp. Water often to preserve even moisture in the soil. A soil ball check is a simple method. Squeeze a couple of s Oil in the pal-M of your hand; a free ball that’s crumbly should be formed by the s Oil. Soil which is too damp varieties a sticky ball, while s Oil does not form a ball and that’s dry is extremely crumbly.

Thin seedlings when two sets of leaves arise, leaving only the most healthy two seedlings in every single container. Leaving also several crops in the region that is expanding produces competitors for nutritional elements and water, which outcomes in crop advancement and inadequate plant. Containers that have A – 20-inch-diameter might be in a position to to allow for as several as eight crops per container, but it is best to to depart only two crops in A5-gallon bucket planter. It is a great indication of over crowding, and that means you ought to eliminate un healthy crops to make area for healthful plants if cucumbers seem to be expanding badly.

Cover the s Oil with one to two inches of mulch or peat moss to assist keep heat and dampness in the s Oil. Don’t add mulch immediately contrary to the plant stalks.

Add cage or a trellis to educate the cucumbers. Using a trellis prospects to cucumbers that are straighter and makes it easier to to allow for mo-Re crops in an individual container. Prop a trellis contrary to the wall supporting the container or cover the container using a tomato cage. Train the vines to weave in and out from cage or the trellis as they grow.

When the vines are about 1 foot-long, utilizing about 1 tablespoon of fertilizer per plant fertilize the cucumbers. Always follow the certain software directions supplied on the fertilizer label to make certain you use the quantity and frequency of software.

Harvest cucumbers although cucumber dimension differs among the various kinds often when they can be on the tiny side, about 8 to 10-inches. Harvesting guarantees the plant proceeds to produce cucumbers that are new. The plant could cease creation if too several cucumbers reach maturity on the vine.

See related

The best way to Replace Window Panels

Windows are a reality of existence in every house, but you do not usually require to hire a panel to be replaced by a window or handy man organization. Even though the work demands treatment and planning correct installation and security factors, changing window panels may be performed by your self with minimum resources and talent.

Remove Damaged Glass

Put on safety glasses, work gloves or face shield. Long-sleeved shirts, pants and closed- shoes are recommended to avoid possible damage.

Remove glass that is damaged manually or with pliers and place it in alternative receptacle or a bucket. In case the split is little or the glass is cracked but not damaged, location duct tape on the window glass in a “x” development and tap the glass using a little hammer or equal device. The tape will help help with elimination and contain glass shards.

Scrape the glass putty also referred to as glazier’s putty — by scraping using a putty knife from across the body. Work the putty knife beneath the putty that is dried and pry to eliminate a part in a time. An electrical heat gun positioned about six to 10″ away can help soften it as you scrape a way if putty is difficult and tough to eliminate.

By prying up using the putty knife glazier ‘s points as you shift combined with putty elimination method. Glazier’s points are little steel clips that can pry easily in the window frame and hold glass in place.

Measure the inside of the window-frame and write down vertical and horizontal measurements. Take the measurements for slicing and also a small bit of damaged glass to make certain proper thickness to your local glass store.

Sand the within of the window-frame with sand-paper and utilize a gentle coat of wood primer using a tiny paintbrush. Allow to dry according to directions.

Install The New Glass Panel

A little amount of glazier’s putty to the the inside edges of the windowframe seat having a putty knife. Squeeze the putty on the body seat if utilizing a tube of putty and sleek with the putty knife. A 1/16-inch thickness is typically enough.

Place the glass in the window-frame and press lightly to embed the glass in to the putty. Use a helper in case the glass panel is too-large to manage safely or consider acquiring or leasing glass suction holders.

Insert glazier’s factors with fingers to the wood throughout the glass perimeter, then press firmly in location with all the putty knife. Points needs to be spaced roughly six to eight inches aside.

Scoop out a dollop of glazier’s putty with all roll and the putty knife right into a cigar that is elongated -like form about 1/2inch diameter. Skip this, if utilizing putty from a tube and check out the following section.

Apply the putty to the within fringe of of the window, and pressing in spot with fingers and smoothing. Before the complete windowframe is sealed continue together with the putty application.

Place the putty knife contrary to bottom and the glass of window-frame a-T a 4-5-diploma angle, scraping gently across the window perimeter to sleek the putty. Remove extra putty with putty knife or fingers.

Allow putty to dry according to producer guidelines and paint straight on the putty in the colour of your selection. This action is optional, as some producers have coloured putty which remove painting.

See related