Disorders of Pineapple Plants

Pineapples (Ananas comosus) offer tart fleshy fruit and are grown in warmer tropical and sub-tropical areas such California and Hawaii. A single plant can produce fruit within many decades, with no requirement for replanting. But with prolonged growth of pineapples come the risks of the diseases which may infect them. As they are grown at ground level, several rot diseases are the most regarding with pineapples.

Black Rot

Black decay, also known as soft decay, types after harvest and is only an issue if the fruit has been damaged in some manner when picked. If this occurs, the decay may develop between the crop time and use by a consumer. Black decay is slow to establish and gets worse the more ripe pineapples are left unused. Dipping the fruit from thiabendazole or benomyl can help slow any growth of this disease.

Leaf Rot

Leaf decay in pineapples happens when planting stock is not kept dry. An excessive amount of air together with moisture causes the leaf decay, which might lead to a whole rotting of the fruit within two or three days. Spraying or dipping with dithane Z-78 will help control the disease in planting materials.

Heart Rot

Heart rot occurs before the pineapples ever leave the floor and is a result of improper soil drainage. The decay affects the central stem of the pineapple and produces a bad smell. Brown leaves are a sign that you might have heart decay on your own plants. Places that are affected need to be nourished with chlorthalonil or zineb in order to eliminate the problem.
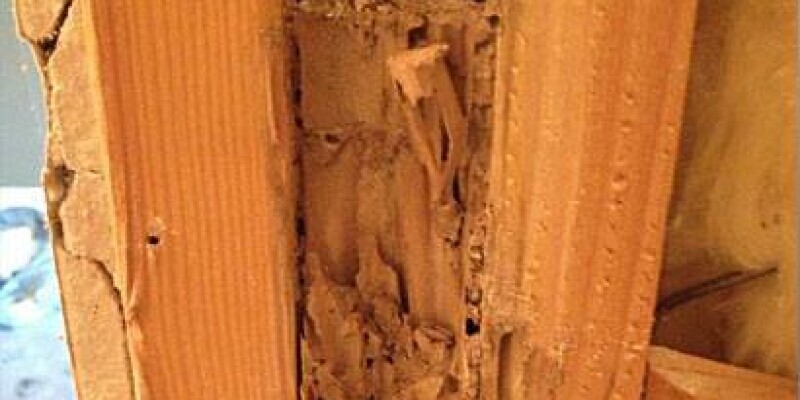
Thielaviopsis Rot

Thielaviopsis decay is not always caused by any particular planting or handling issues; nevertheless, it will destroy a pineapple plant. It develops during the handling process, and the only sign you will have that there is an problem is that the skin will darken slightly because it is keeping additional moisture. Careful handling is the main way to prevent this disease, as well as maintaining the pineapples trendy.

Pineapple Wilt

Pineapple wilt happens when mealybugs are present and transmit the virus into the pineapple plant. Preventing this dilemma requires a therapy, not for your mealybugs, however for the ants which bring from the bugs.

See related

How to Propagate Asparagus Indoors

Sometimes called foxtail ferns, asparagus ferns (Protasparagus densiflorus) are perennial ornamental plants cultivated for their brushy, cylindrical stems and arching growth habit. They are most commonly grown inside due to their frost sensitivity, although they will also grow outdoors over U.S. Department of Agriculture plant hardiness zone 9. Asparagus ferns spread reliably in spring out from both fresh seeds and root divisions. But seed propagation works best for non-hybrid varieties, whereas root divisions must be utilized to spread hybrid cultivars since most don’t produce viable seed.

Propagating an Asparagus Fern from endothelial

Soak fresh asparagus fern seeds in water for 24 hours to soften the outer hull and prompt fast germination. Prepare growing containers prior to draining the seeds so seeds wo not have time to dry out prior to sowing.

Fill 3-inch starter pots with sterile seed compost. Moisten the compost and let the water drain off for 10 to 15 minutes. Poke a 1/4-inch-deep planting hole in the center of the compost. Put two asparagus fern seeds inside and cover them with extra compost.

Place the starter pots to a germination mat. Drape a sheet of plastic wrap over the pots, or cover them with a plastic propagation dome. Set the temperature on the germination mat to 85 F during the day and 70 F at night.

Moisten the seed compost whenever it feels dry to the touch. Water with a spray bottle to prevent disrupting the asparagus fern seeds. Do not allow the compost to dry out completely, but also don’t allow it to become boggy.

Watch for germination in about three to four weeks. Eliminate the weaker of the two asparagus fern seedlings from each pot if both seeds efficiently germinate.

Grow the seedlings near a big, bright window in which temperatures stay around 70 F during the day till they produce two sets of mature leaves. Transplant them to 4-inch pots filled with lightweight, acidic potting mix.

Propagating an Asparagus Fern from Divisions

Water the parent asparagus fern plant the night before dividing the root ball. Add water into the soil till it feels saturated from the top 3 inches. Let the water soak in overnight to ensure the leaf and roots are well-hydrated.

Remove the asparagus fern from its pot the subsequent day. Crumble off half of the soil from the root ball. Separate the fronds into equal parts and secure each part with a twist tie or a bit of string.

Cut straight down through the root ball involving the frond parts having a sharp, clean knife. Make certain each department has an identical share of fronds and origins since the divisions will not survive if too little or underdeveloped.

Pot each division in a 6-inch square pot filled with lightweight, acidic potting mix. Make sure that the base of the fronds is 1/4 inch over the surrounding soil. Water the soil mix to settle it rather than pressing it together with your hands.

Grow the divisions below the same warm, bright conditions like the parent plant. Water whenever the soil feels dry in the first two inches. Avoid over-watering since the newly severed roots are prone to mold and rot.

Transplant the divisions to your permanent planter once they show obvious signs of growth. Move them into a container that’s no more than 1 inch larger than their original pot.

See related

Tomato Plants Wilting Due to Cold Weather

In coastal regions that drop into U.S. Department of Agriculture zones 8, 9 and 10, frost damage isn’t as common due to the warm winter temperatures. After spring planting begins, threat of frost has generally passed. However, cold weather may harm brand new plants and cause the decline of mature plants. Protecting tomatoes from winter’s chill will extend the life of the plant and increase crop production.

Symptoms of Cold Damage

Wilting is just one of several indications of damage from cold or frost. Newly transplanted tomatoes might have olive green and yellowing leaves, with a purplish bottom. Leaves on more based tomato crops will turn black and wilt. These blackened leaves might be pinched off, but leaves which are still green will recover if warmer temperatures return.

Protecting Tomatoes In Frost

Frost damage is simply a danger at the beginning of the growing season, and at the finish. If you planted tomatoes really early in the spring, or if you want to extend the growing season of the tomato plant into the fall, you can prevent frost damage with resources like blankets and technical covers. Although household blankets are a frequent tool used to protect plants, blankets can worsen the problem by trapping cool atmosphere beneath them if they become wet. Specialized garden covers don’t have this effect. Some covers have been designed specifically to absorb heat during the day and will radiate heat at night after the sun has gone down. Furthermore, some technical garden covers may be left draped over a plant for several days at a time. Checking nightly forecasts will tell you if those covers should be used.

Sheltered Locations Prevent Damage

If you’re a gardener who knows that you want to cultivate your tomato plants after into the growing season, container gardening may be suitable for you. Containers permit you to transfer tomatoes to safety on chilly nights. If you prefer to cultivate your tomatoes in the ground, you can plant your tomatoes near a wall having a southern exposure. Southern exposures get the daylight while sunlight is out, and at night the wall will radiate heat back into the atmosphere near the plant.

When to Plant

To avoid the chance of frost damage at the time of planting, tomato seedlings are best planted when soil temperatures reach 60 degrees Fahrenheit, notes that the University of Missouri Extension. It is possible to assess the temperature of the soil using a soil thermometer, available at nurseries and home and garden centres.

See related

The way to Determine if a Fireplace Thermocouple Failed

The thermocouple on your gas fireplace is a heat-sensitive apparatus that keeps the pilot gas tube open while the pilot is lit. It does this by creating a small electric current — on the order of 10 to 30 millivolts — as a sign to the gas valve. Thermocouples wear and so are replaceable, but you should conduct a few straightforward tests before doing this, because your gas pilot could possibly be moving out for another reason. The thermopile is a connected apparatus you should test at the exact same time — its role is to open the gas to the burners.

Assess the Pilot

Locate the pilot, frequently behind a removable grill running across the bottom of the fireplace. Light the pilot with the recommended procedure for your fireplace. The typical procedure is to turn the gas valve to “Pilot,” push in the knob and then depress the red ignitor button until the pilot lights. If you have an older fireplace, you may need to light the pilot with a long match.

Hold the knob in for 60 seconds, then release it. If the thermocouple is functioning, the pilot must stay lit. If the pilot goes out, then relight it and check the flame. It should be about an inch in length and mainly bluish in color, and it should be in contact with the tip of the thermocouple.

Clean the pilot tube with compressed air, following the manufacturer’s instructions, if the pilot flame is irregular or small. Move the thermocouple tip nearer to the flame if it was not within the flame’s hit with the pilot was lit. Relight the pilot and also attempt the test again.

Examine the thermocouple with a multimeter when the pilot goes out again. Set the meter to measure millivolts and, to make measurement easier, fit the leads with alligator clips.

Locate the gas valve — it’s usually behind a grill on the front of the fireplace and discover the copper thermocouple cable leading from it. The best way to do this is to follow the cable back in the tip of the thermocouple, which is right next to the pilot light. Unscrew the thermocouple fitting and eliminate it in the valve, using a 7/16-inch wrench. Catch the pilot end of the thermocouple in place.

Attach one lead of the multimeter to the silvered finish of the thermocouple cable (the component that made contact with the gas valve) and the other lead to the bare copper thermocouple cable. Light the pilot, then be sure that the flame is connected with the thermocouple tip and then hold from the gas valve for 60 seconds. You should get a meter reading of 20 to 30 millivolts (or within the very low range of the thermocouple’s score; voltages vary by product). If the reading is less than 20 millivolts, it’s time to replace the thermocouple.

See related

How to Correct Pool Water Circulation

Crystal clear pool is a science — literally. Proper water chemistry is vital to maintaining the water from becoming muddy or microbes from growing. But even when the chemical levels are in equilibrium, a pool may still encounter problems when the water does not circulate well enough. Powerful circulation keeps the pool clean of debris by running it through the filter. You can usually remedy the issue of inferior pool water flow by making a few changes to your care routine to help keep the water moving.

Rank the Jets

A pool typically includes two to three reunite jets at which water that filters through the flow system returns to the pool. For successful circulation, it will help to get these multidirectional jets, because they let you determine the direction the water returns to the pool. Point the jets in a direction that spins the water in the pool. Typically, that means guiding the jets to emit water and in the contrary direction of this pool skimmer — that installation helps mixture water from the base of the pool with water at the surface for improved flow.

Address Dead Areas

No matter how you prepare the jets, then there are usually places in a pool that suffer from poor circulation. Known as lifeless locations, these spots include places on the other side of the pool steps and ladders, adjacent to the skimmer and return fittings, corners in a rectangular pool, the center of a round or oval pool as well as the bottom half of a pool with no main or bottom drain. By pointing the return jets downward, it means that water circulates more effectively through the pool to reach many of these dead places. But best practices involve replacing conventional return jets with a specialty fitting that is designed to circulate water by rotating, which disperses water more effectively. You also need to run the pool filter at least eight hours a day in order that the water moves through the flow system regularly. Regular use of this pool for swimming and perform activities may also help circulate water into dead places.

Regular Cleaning

Cleaning the pool on a consistent basis is another crucial step in correcting its flow. Take some time to brush dead areas to eliminate dirt, algae and other debris that might cling to these areas, so the filter has a opportunity to eliminate them from the water. Brush the pool at least once a week with brush fitted into a telescopic pole to readily adjust its length to reach most areas of the pool. Normal vacuuming also assists with flow. You might want to hook up a automatic vacuum and leave it to the base of the pool for an whole day at least once weekly to completely address these dead places.

Wash the Filter

Clean out the filter regularly to prevent clogs that could back up the machine. For a filter, turn off the pump and open the air bleed valves at the filter’s very top and the drain vent at the bottom, so the water drains from the filter housing. Remove the filter cartridges and then rinse with a garden hose, and then clean the filter tank of debris as well. Having a sand or diatomaceous earth filter, then turn off the pump and then open the valve for the release or waste line. Attach the release hose and direct it where you want the dirty water to go. Move the filter lever into the “Backwash” position and restart the pump. Watch the water in the filter’s view glass — after it’s clear, you can turn off the pump, place the lever back to filter and then restart the pump.

See related

What Is the White Powder Under Some of the Leaves on My Mexican Faux Orange Tree?

Mexican faux, or mock, orange (Choisya ternata) smells wonderful all year, thanks to its orange-scented, deep green leaves and perfumed summer and spring blooms. This evergreen shrub grows in U.S. Department of Agriculture plant hardiness zones 7 through 10. Its troubles are several, and one of the rarest is a powdery, white bug nymph that feeds on the backs of its leaves.

The Citrophilus Mealybug

In the 1920s, the sap-draining citrophilus mealybug (Pseudococcus calceolariae) has been decimating thousands of citrus orchards. As a non-native, the pest had no natural enemies. On a detective mission to Australia, University of California biological management scientist Harold Compere found and imported two citrophilus-parasitizing wasp species. After being forced to do their work, the wasps nearly — but not entirely — eradicated the pests. While it still infests citrus trees (Citrus spp.) , citrophilus and its nymphs, or crawlers, also feed sometimes on Mexican orange. Citrus trees typically grow in USDA zones 9 through 11.

Nymphs vs. Adults

When white powder dusts the backs of its leaves, Mexican mock orange is hosting citrophilus nymphs, or crawlers. Wind, tools, clothing or animals spread the very small crawlers to the plant if no adults are present. Shortly after hatching, the crawlers start covering themselves with a protective layer of powdery, white wax. Nevertheless, they are too small to be distinguishable with no 10X magnifying lens. At about 1/16 inch long, the adult females are easier to see their heavenly, white egg sacs, they look from a distance like pieces of cotton wool.

Possible Damage

Citrophilus mealybugs weaken a Mexican mock orange by draining sap from its leaves and stalks. In addition they drench the plants at honeydew, their gooey, clear waste. Windborne sooty mould spores feeding on the honeydew cover the leaves with layers of oily, black fungus. It does not tighten the leaf tissue, but a thick coating can interfere with photosynthesis and tighten the plant much longer. The crawlers reach adulthood in two to three months, and every single adult female lays up to 500 eggs. Without rapid treatment, a couple crawlers might become a serious threat to the tree’s health.

Cultural Crawler Control

The fastest way to rid your Mexican mock orange of citrophilus crawlers is to direct a forceful blast of water from the hose in the plant until all of its surfaces drip. If infested citrus trees are nearby, the end might be making regular crawler deposits on your plant. Monitor the plants and spray as required to dislodge new infestations.

Chemical Crawler Control

The parasitic wasps (Coccophagus gurneyi, Tetracnemus pretiosus) released in the 1920s continue to maintain citrophilus in nonthreatening levels. If the crawlers need chemical treatment, ready-to-use insecticidal soap suffocates them on contact, but does not harm the wasps after it dries. When no sunlight is hitting the shrub, spray until the soap drips from either side of the leaves. Repeat every a couple of weeks, or even in the brand’s recommended period, until the infestation stops. Wear long pants, a long-sleeved shirt, hat and protective eyewear, and follow the label instructions when spraying.

See related

The Way to Declutter in 21 Days

Clutter can pose a menace to your general wellness. It is those heaps of mail on the kitchen counter, heaps of toys in the living room and clothing of all sorts dangling off the banister which cause you to wish to either cry, shout or any blend of the two. By adhering to a 21-day decluttering ritual, put an end to this household menace. Spend just a little time every day to properly storing your household products and picking up, and shortly your home, and your thoughts, will be clutter-free.

Getting Started

Dedicate 2 or an hour, to decluttering the high heeled areas of your residence for seven days. Dedicate three weekends to the areas having the most clutter: the mudroom, the bedrooms and the kitchen. Save the weekend for falling items off: one day in the recycling centre and the other for visiting the donation centre to contribute goods.

Nightly Decluttering

Sort through the piles of magazines, mail and other newspapers. Save and recycle, or give the remainder, away. Books, CDs and DVDs. Ensure that the appropriate disc is at DVD containers and the proper CE. Pick up and wash any blankets and keep them in rolled bundles in large, sealable plastic bags. Keep these available and use the nicer blankets for the more ugly blankets along with overnight guests to use when the children or you get sick. Have your children put the toys away every day, that they use. Get in the habit of washing dishes and putting the dishes away as well as the ingredients used to make supper.

First Weekend

Start in the mudroom, or entryway, of your house. Have every member of the household attempt on shoes, and at a bin, place the kid shoes which no longer match to spare for children. Throw out shoes or shoes which a cobbler can’t fix. Try on the rest of the items at the mudroom. If you are keeping themwash them and put them in the closet. Organize unique items and place in other containers that are labeled or bins. Organize hats, shoes and gloves by place and household member in bins or other storage containers. Assess umbrellas for broken bits or rips in the fabric, and put umbrellas that are intact inside their storage container that is labeled.

Second Weekend

Proceed to the bedrooms. Wash and put away any clothes that has been either on the floor or at the hampers. Examine the clothes and contribute anything. Have children determine what can be kept, given or thrown out and try on their clothes. Store any accessories, like jewelry or scarves. Organize the children’s desks in addition to all the bureaus’ tops. Have the children arrange their toys along with their rooms. Bring all of the toys for their own bedrooms and place them in the suitable storage bins. Donate outgrown toys which no other children in the house can use and correctly dispose of broken toys.

Third Weekend

Tackle the kitchen during the previous period of your procedure. Clean out the cabinets and drawers you at a time, if you will use these products and assess. Carefully restock and put everything at a bin of items to be donated. Close to the end of the 21-day period, take inventory of what remains. If your space is not quite as minimal as you would like, challenge yourself to ditch all of the items you can live without into bag or a garbage bin and then evaluate what should get thrown out and what can be donated.

Going Forward

Produce a decluttering schedule which work best for your family and you. Set aside per week for reading and sorting mail. Mandate that items must be performed like hanging up coats and putting shoes in the appropriate bins.

See related

How to Keep Kitchen Dish Towels From Falling Off a Stove Handle

At the kitchen, only a few things are more annoying than a clean dish towel that keeps falling in the cooker handle onto the dirty ground. However, after applying even the most novice sewing skills, it is possible to fix the problem once and forever. And after you get good at it, it is possible to make gifts for people or carry your creations to another flea market to sell.

Extra-Large Buttonhole

Approximately 1 to 2 inches down, centered in the cover of the towel, sew a supplementary buttonhole about 3 inches long. Newer sewing machines have the buttonhole feature built in today. After sewing the buttonhole, cut between the stitches with a utility knife to start it up. Remove scraggly threads and discard. Insert the dish towel behind the stove handle together with the extra-large buttonhole on top, pulling it downward to ensure that it passes the cooker handle. Thread the bottom of the dish towel through the buttonhole and pull it taut. The dish towel stays in place.

All Buttoned Up

You can even sew a knitted contrasting cloth on the cover of the towel with a pointed end and a buttonhole within it. Sew a button on the contrasting fabric to attach the dish towel into the stove handle. Thread the tilted end using the buttonhole inside it through the stove handle; pull it over and slide the button through it. The dish towel won’t come off until you unbutton it.

See related

What Color Wall Paint Can Go With Merlot-Colored Furniture?

Merlot is a blueish grape that vintners may blend with cabernet sauvignons and Bordeaux wines, or jar the varietal on its own. The color merlot varies as much as the intricate flavors of the grape — by a purplish-red into a blue-purple into a almost-black — and it may be mistaken with wine, Bordeaux, blackberry and burgundy. Cherry wood is a rich color, and merlot is a effective upholstery color. Wall paint colors balance merlot furniture and exhibit.

Industrial Grape

Actual concrete walls or faux — a variegated, rough-textured blend of medium and mild grays — are a foil a living room’s focal point, for a lavish velvet sofa. Pick up the industrial wall shade in a silky low-pile carpet in a very simple pattern of silver-gray and merlot to coincide with the couch. Frame the walls and keep the palette extremely easy: silvered metals, white, the soft grey of the walls, and a glass vase crammed with almost black hydrangeas or calla lilies and deep purple.

Merlot and Marble

Cherry wood cabinets in the kitchen would be too dark and dramatic in the room without the balance of textures and colors. Cabinets and a work island with lots of marble and operate a wide marble backsplash all over the room. A stainless cooker, dishwasher and fridge include extra gleam and a touch, pickled flooring and as do the walls. The white paint’s slight chalky gray tint invites a couple of accents to offset the red tones of the wood. Set a blackberry or blueberry enameled mixer, toaster or coffee maker on the counter tops. Fill out a bowl that is porcelain with eggplants or blue-black plums.

Formal Dining

The luster of a classic dining room is improved by a careful combination of upholstery, wall and wood colors. Striped brocade cushions on the hardwood chairs reflect the red-merlot hue of the stained sideboard. Apricot walls at a gloss are edged trim. And the curtains are a mix of vitality and luxury from silk taffeta, lined with ivory silk that is heavy. The reddish-purple wine shade warms the room, along with the tones of orange help to pull together its ornate although disparate elements.

Purple Passion

An Art Deco-inspired master suite is pure theatre when merlot and black dominate the room. From the inlaid dresser to the ebony bed frame with satin bedspread, there’s no mistaking the space’s message. Black enameled walls and a tarnished ceiling gleam like a night sky. Silver wall-to-wall carpet, layered with orientals in black, pewter, wine and silver designs, echo the colors of ceiling, the walls and furnishings. Pewter silk curtains, strung in merlot to coincide with the comforter, punctuate the walls that are inky. Work with a lighting designer to acquire the task and ambient lighting just right in a room with a color character.

See related