Fruit Trees to Plant for a Deer

While deer are often considered pests in a home landscape or orchard, a lot of individuals still enjoy seeing them graze across the edges of the house. Deer will eat several plants, but a dependable fruit crop is always a welcomed treat throughout the year.

Deer Species

Throughout America, the two most common species of deer would be the white-tailed deer (Odocoileus virginianus) and mule deer (Odocoileus hemionus), together with subspecies. White-tailed deer are more slender-bodied, while mule deer have stockier bodies and bigger ears. Populations of both species are big throughout their respective territories, although some areas have bigger populations than the others. Both species are fond of orchards and landscape plants, including fruits and fruit trees.

Fruit Trees

Deer will graciously accept any fruit on your property as a delicious meal. Nearly all fruit trees are frequented by deer populations when available, including apples (Malus spp.) , pears (Pyrus spp.) , and especially bananas and plums (Prunus spp.) . Throughout the late summer and autumn, deer frequent orchards and landscapes to obtain the sweet, tender fruit. During other times of the year, they’ll consume tender leaves, stems, buds and blooms when given the chance.

Attracting Deer With Fruit Trees

Deer tend to forage across a wooded edge, due to the safety of the forest. This isn’t always the case, however, as a deer will roam into more open areas once it has found a dependable, tasty food resource. To feed the deer on your house, plant a few fruit trees and its advantages. While doing so will probably bring any deer in the vicinity to your house, this will also bring them to the rest of your landscape as well.

Other Deer-Friendly Plants

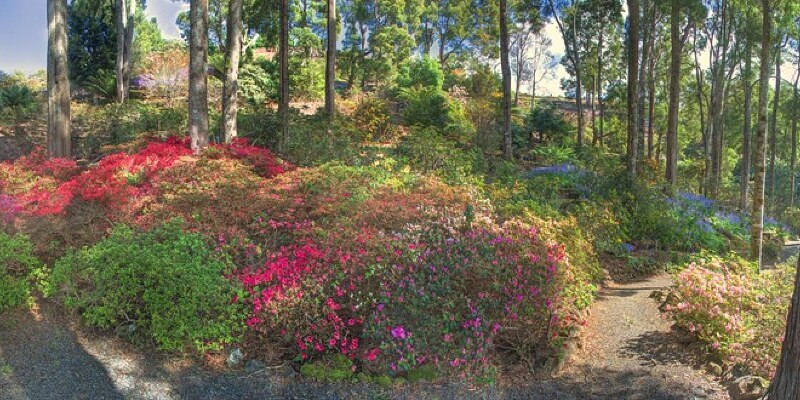
Deer will eat nearly anything and almost no plant is really “deer-resistant.” Some are more highly favored than others, though, and will help attract the regional deer population to your property. Favorite plants of deer consist of various arborvitae species (Thuja spp.) , azaleas (Rhododendron spp.) , hostas (Hosta spp.) , oaks (Quercus spp.) And various hydrangeas (Hydrangea spp.) .

See related

The way to Dissolve Tree Stumps

Before the arrival of herbicides and stump grinders, removing tree stumps was a laborious and time-intensive task. As a result of modern improvements in horticulture, ridding your yard of tree stumps is as simple as drilling holes and filling them with granules. Many stump-dissolving herbicides are composed of potassium nitrate, a slow-acting chemical that may take several weeks to dissolve stumps entirely.

Drill several 1-inch broad holes through the top of each tree stump by using a 1-inch spade bit and bit extension on a power drill. Make every hole about 12 inches deep and 3 inches from the edge of its stump.

Drill more holes that are around 12 inches deep across the surfaces of the stumps. Drill them every 3 to 4 inches apart from each stump shirt and at a 45-degree angle pointing toward the ground.

Pour potassium nitrate stump removal granules into a watering can that has a narrow spout, and pour the granules into all of the holes that you drilled. Fill the holes with water.

Wait four to six weeks for the potassium nitrate to dissolve the stumps. Keep children and pets away from the stumps throughout that moment.

Examine the stumps for sponginess. Chop spongy stumps with an axe to eliminate their parts. Fill cavities left from the stumps using soil or sod.

See related

Ideas for a Muddy Garden

Persistent moisture in your lawn can detract from the general appearance of the landscape, impair play and other actions, make lawn mowing and other maintenance tasks challenging, and threaten to seep into adjacent structures. Sometimes easy adjustments or corrective actions can reduce muddy soil and excessive lawn moisture; other cases warrant more drastic efforts that involve greater labor or cost.

Simple Fixes

Easy actions or corrections can sometimes significantly improve moisture problems in the lawn. Ensure that gutters, downspouts and other drainage features are not clogged and can handle the flow of water. Make sure downspouts stretch far enough out that they direct runoff away from the structure or landscaping. If you can, have them drain right into an outlet like a ditch, swale or pond. Clearing overgrown ditches or swales of dense vegetation that slows the planned flow of water, as well as removing soil or other debris that has filled or clogged a drainage characteristic may also improve conditions.

Dethatching and Aerating

Even with good care, a yard can eventually develop thick thatch — the brownish layer of dead and living grass stems, roots and other debris between the soil surface and the base of the green grass blades. If thatch thicker than 1/2 inch accumulates, it can keep water out of readily entering the turf. Where soil is compacted, pore space is restricted and the amount of water an area can absorb and hold will be diminished. Dethatching a lawn, also known as vertical mowing, and aerating are routine lawn care tasks you should perform at least one time per year when grass is actively growing. These measures encourage turf health by allowing air and moisture to better penetrate the soil surface.

Subsurface Drainage

You can install French drains, drain tiles and comparable attributes alongside structures, where they could capture water that runs off from the roof or downspouts or into low spots in the backyard. If there are only a few low spots, a subsurface drain to direct water into an outlet may offer adequate relief. The drains usually consist of a trench dug at least 2 feet deep and a foot wide with a bottom that slopes slightly toward the outlet and is lined with filter cloth. A 4-inch perforated pipe is put in the center of the trench bottom, covered with 12 inches of coarse, clean gravel and a second layer of cloth before the rest of the trench is full of gravel or soil and planted. If you already have subsurface drains in your lawn, ensure they are not clogged. Make sure that the outlet isn’t obstructed by scrutinizing tit for an appropriately strong stream of water when it rains. Dig up and clean or replace any silted and clogged piping or gravel.

Drastic Measures

When dethatching, aerating and other straightforward remedies are ineffective, the soil quality and total grade of the lawn may require attention. Measures to correct sever lawn drainage issues include removing turf and other small vegetation; putting around existing trees and shrubs; tilling the ground deeply to split the top 8 to 12 inches; functioning 6 inches of the organic-matter soil amendment uniformly into the soil; also pitching the soil surface so the ground slopes away from any structures at a speed of 1 percent toward an outlet. In some cases, it may help to make a small pond or rain garden with water-loving vegetation where excess water can drain.

Living With the Mud

If addressing the reason behind excessive lawn moisture is not feasible, a few things can make living with a muddy yard more bearable. You can cover the muddy parts of the lawn with cardboard or plywood as a temporary means to prevent tearing up the muddy place any further or monitoring the mud inside. Installing stepping stones or placing landscape material and covering it with gravel are additional nonpermanent fixes. Building a raised bed using landscape timbers, bricks, concrete blocks or other materials, or utilizing containers, permits plant cultivation without needing to remedy the muddy conditions.

See related

How to Replace Oven Ignitors

A gas oven has a burner that offers baking heat into the oven. In some cases, the oven will also have another burner for broiling inside the oven. On newer gas heaters that are not equipped with a pilot light, these burners are lit by an electric oven ignitor. After the oven is turned on, then the ignitor glows, lighting the gas flame of the burner. If your ignitor doesn’t shine when turning on the oven, then it is possible to change out your ignitor in around an hour using a few basic hand tools.

Slide the oven off from the wall. Unplug the electric plug from the socket.

Switch off the gas at the gas valve supporting the oven by rotating the knob on the valve clockwise until it stops turning. Then disconnect the gas line from the valve using an adjustable wrench.

Slide out and eliminate the warming drawer from under the oven. Look underneath the oven using a flashlight and find the ignitor connected to the bottom panel under the oven. Unscrew the screws that hold the ignitor set up and set the screws aside.

Pull the ignitor away from the mount. If the ignitor’s wires have been connected using a wiring harness, separate the 2 halves of the tap before connecting the new ignitor into the tap. If the ignitor is hard-wired, clip the wires using a pair of cable cutters, then strip 1/2-inch of insulation from the ends of the 2 wires under the oven, in addition to from the two wires of this new ignitor.

Twist together the hints of one of these wires from the new ignitor to one of the stripped wires from the stove, and connect the two with one of these ceramic wire nuts that are included using the ignitor. Then connect the other two wires in similar fashion.

Remount the ignitor and attach it using the mounting screws. Then reconnect the gas line and then turn on the gas. Next, plug in the oven into the socket. Examine the ignitor. If the oven operates correctly, replace the warming drawer and then push the oven back into position.

See related

How Far Away Should Sensors Be Around an A/C Unit?

Air conditioning is no longer just a luxury; in regions with hot weather, air conditioning allows people work more productively, kids to attend school year and families to enjoy evenings without huddling about a fan. Together with the rising cost of energy, however, efficiency becomes important. What grows — and where it grows — about your condenser can influence that efficiency.

Landscaping Matters

Your air conditioner circulates a fluid fluid through a set of pipes and coils until it absorbs enough heat within the house to evaporate into a gas. A compressor subsequently re-pressurizes it, releasing absorbed heat and turning it back into a fluid. The condenser unit sits outside — or in the back of the window unit. The aluminum fins and fan observable on the unit optimize the surface and air available to port the heat that builds up since the gas hardened. As vital as tidy, unobscured fins and smoothly functioning enthusiasts may be, the space around the unit has to be free to permit rapid dissipation of heated air to avoid overworking the circulating pumps and blowers and condenser unit fan.

Trees

The comparative coolness of shade allows faster dissipation of heat in a condenser on a hot day, so planting a tree will help unit efficiency. A tree planted to the west of this condenser unit offers shade, but pick a drought-tolerant species since the overhanging branches will be subject to continuous breezes of hot, dry air. The National Fire Protection Association says that to be fire-safe, the tree must be planted at least 30 feet in the house and cleared of branches from 6 to 10 feet up from the ground.

Shrubs and Herbaceous Plants

Shrubs planted closer to the condenser than 3 feet will not simply act as baffles to air movement, they can also shed leaves, twigs and other plant materials that might wind up in the seams round the sides or fan casement of this unit. Grasses and perennials that grow more than 6 inches high must also be planted at least 2 to 3 feet away from the underside of this unit since ventilation to the unit can also be drawn from that region.

Other Considerations

Avoid placing containerized plants close — or on top of condenser units. Unit vibration can bounce pots off the top of the unit or, worse, into the fan compartment. Whatever plants are installed around your condenser unit, then make certain to keep woody plants pruned neatly, and immediately clean up any deciduous litter. If a unit has to be concealed, consider a good fence or low wall in the exact same space as plants — it’ll require less maintenance, and you won’t have to purchase fertilizer.

See related

The main System of a Weeping Willow

Weeping willows (Salix spp.) Produce extensive root systems that spread much beyond their canopies. The competitive root systems of these trees may damage pavements and buried structures around them. Installing protective root barriers around vulnerable buried structures and picking out the right planting spot for your own weeping willow helps ensure the long-term wellbeing of your tree and protects your property from damage.

Growth Habit

The origins of weeping willow trees create a network of shallow roots that spread out of the tree in each direction. Weeping willow roots may spread out from the back up to 3 times the distance between the edge of the tree foliage and its trunk. Weeping willows typically produce leaf that is between 45 and 70 feet wide at maturity with roots that may spread approximately 100 feet in the center of the trunk of large specimens.

Planting Locations

Weeping willows have a broad growth habit above and below the ground that requires an open space. Weeping willows grow well in full or partially shaded places but favor direct sunlight. The origins of weeping willow are adapted to moist soils made of clay, loam or sand with an acidic or alkaline pH but grow best in regions that are well-drained and free of competing origins from other plants. Selecting areas with appropriate drainage helps stop the growth of fungi in the soil and prevents root rot.

Root Care

Weeping willows have extensive root systems that grow near the surface. Disturbing the soil around your willow may damage its origins, weakening your tree and rendering it vulnerable to additional damage from insects, disease or weather. In case a mowed lawn surrounds your willow, then take care to avoid damaging roots that broach the surface once you mow.

Root Barriers

Root barriers can stop the root system of your weeping willow from damaging unseen sewer and water lines, septic tanks or base walls. Physical root barriers made of plastic or metal concealed between your weeping willow and vulnerable structures limit the growth of large potentially harmful origins. Wire mesh root barriers allow small roots to spread beyond the barrier and permit water to drain through the barrier. Solid barriers of metal or plastic often force origins to grow around them and can prevent water in the soil from draining properly.

Considerations

Root barriers are most effective when they’re buried at least 3 feet deep. Using a root barrier that runs the entire length of this structure you want to guard ensures that the broad root system of this weeping willow does not merely grow around the barrier. Using a substandard root barrier only postpones the damage this tree may cause. The origins of weeping willow trees frequently broach the surface of the soil and can result in substantial damage to sidewalks and other paved surfaces near the tree.

See related

Affordable Heating & Humidity for a Greenhouse

Each plant species inside your greenhouse has another set of heat and humidity needs; strawberries love moist states, whereas cacti require spaces that are dry. With typical electrical energy so pricey, finding a cheap form of heat and humidity is a significant goal for budget-minded gardeners who want to give all their indoor plants the best chance at fruiting and blooming. Your greenhouse does not have to suffer from poor climate conditions if you are creative with your heat alternatives.

Greenhouse Construction

The smartest way to efficiently heat your greenhouse is using the sun’s radiation. By keeping a dual plastic layer covering around your greenhouse, you efficiently trap the heat generated during the afternoon and an air gap between the plastic layers adds a second degree of insulation from cool winds. Insulating a north wall with plywood or other heavy structure material also assists the retained heat stay inside the galaxy walls, as light is minimum over the north side and bows tend to strike this side using ferocity.

Evaporative Cooling Fans

Even though a large plant grouping creates a lot of humidity through transpiration, the plants may still require more humidity than obviously generated. Professional evaporative coolers are normally costly, yet another choice is add-on misters that attach directly to your basic pedestal fan. Placing the fan using the attached mister to the greenhouse can help to circulate air and uniformly add more moisture. Consequently, you have a cheap type of humidity that’s easily portable inside the space or removed completely when not required.

Inexpensive Heating Fuels

Even the most mild climate may call for a greenhouse heater, as winter nighttime temperatures easily damage plants which aren’t properly warmed indoors. A number of mobile heaters fueled by propane are available and relatively cheap. You place them as required and remove them once spring and summer temperatures return. Instead, natural gas will be a cheap fuel choice, but requires a lasting heater assembly which can be costly at the initial purchase time.

Compost

A more natural heat and heat solution is using compost. Since the compost decomposes in a container positioned within the greenhouse, the materials generate heat. This heat expands and warms the immediate area around the container. Compost also provides a small amount of humidity, as the damp materials disappear moisture, like fundamental soil. If your greenhouse has a concrete floor, adding various compost containers throughout the space will include a significant amount of moisture to the air. Greenhouses with soil floors tend to have more moisture obviously from evaporative procedures at the ground level.

See related

The very best Mulching Materials

Mulching around your garden or landscape plants might aid in improving their physical appearance, reduce erosion, conserve water and improve the overall look of the soil. In some areas where water conservation is a significant concern, mulching is even mandated by law. Not every mulch material has the same properties or works nicely for the same plants, however. Should you take the opportunity to inspect the advantages and downsides of all of the significant mulching materials before purchasing, you’ll have the ability to find the very best mulch for your specific garden and situation.

Wood and Bark

Chipped wood and bark, in addition to sawdust and ground wood mulch, are affordable substances that will help conserve water and improve moisture penetration. They may be employed by themselves or placed over plastic or landscape material. Uncomposted wood mulches can tie up soil nitrogen because they decay but become a rich source of this nutrient following several years have passed. Some wood mulches can harbor termites and other insect pests, but cedar and cedar are insect-resistant.

Grass, Hay and Straw

These mulch materials could be picked from the landscape or bought cheaply from local origins. They are reliably available and simple to apply, but may mat should you use a very thick layer. Straw is free of seeds, but grass clippings and hay may incorporate weed seeds that could invade your own landscape. All of grass-type mulch materials should be thoroughly dry once you employ them to reduce mold. Pine needles provide similar benefits but are much more acidic than wax or grass.

Leaf Damage and Compost

These partially decayed mulches are less ornamental than some other materials, but they’re also less inclined to tie up important nutrients your plants need. These substances are relatively cheap and easy to find, but they must be prepared properly to eliminate weed seeds and other potentially problematic inclusions. Leaf mould can be acidic and must be used carefully in high pH soils.

Paper

Paper provides an inexpensive, easy-to-apply mulch alternative, particularly for vegetable gardens. Shredded newspapers perform like grass and hay but without the potential for grass seeds. Both shredded and folded paper lack stability in windy conditions and need compost or straw to hold them in place. Resin or raisin paper contains a water-resistant resin that causes it to break down more slowly. You need less of the paper to produce effective mulch, but it still needs compost or another absorbent material to keep it from blowing away. Paper can also harbor sow bugs and earwigs.

Plastics

Plastic mulches are typical in commercial farms and also some larger home-growing situations. They can help heat up the soil in spring and reduce vandalism and evaporation. Black plastic additionally controls weeds, but crystal clear plastic doesn’t — except when used as part of a soil solarization process. Polypropylene fabric is more expensive than these alternatives but allows air and water to penetrate. Most conventional plastics break down from wind, sunlight and rain but don’t biodegrade, making disposal a concern. You can also choose special photodegradable plastic picture that may not have to be taken out of the area.

Stone and Sand

Rocks and mud are more often employed for landscapes rather than vegetable gardens, because they can be extremely heavy and can make the ground very warm. These nonorganic mulches cut down on weed growth and produce a beautiful landscape but can be very pricey compared to other kinds of mulch. Landscape fabric must be used beneath both these types of mulch to keep them from sinking into the ground.

See related